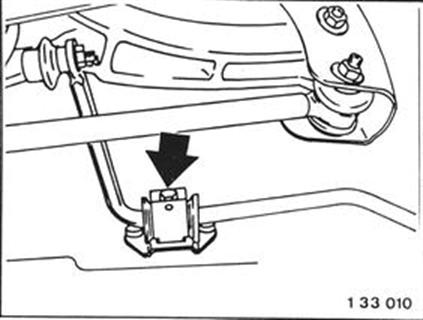
REMOVING AND INSTALLING FINAL DRIVE Remove muffler - see Gr. 18. Unscrew stabilizer mounts on left and right sides.  18 12 000 18 12 000
|  |
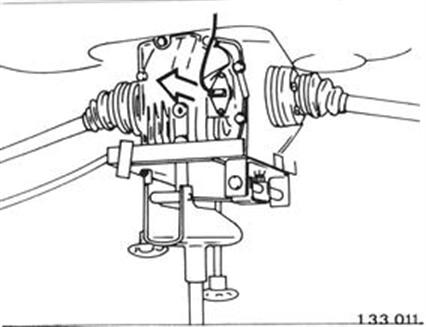
Support final drive from underneath with a transmission lifter*. Pull off plug. * Source of Supply: HWB
|  |
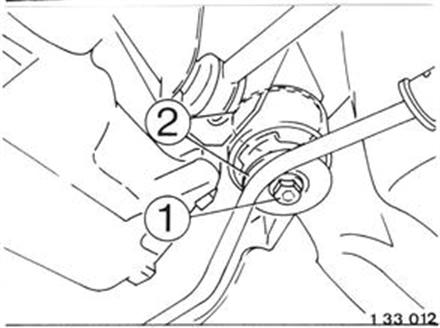
Unscrew nut (1). Installation Use stop washer (2) at top and bottom. Install final drive mounts without tension - see slot; if applicable adjust with the slots in the engine mount brackets (see Group 11). Tightening torque = 180 Nm (130 ft. lbs.). 11 00 000
|  |
Unscrew output shafts on left and right sides and suspend from car on wire. Installation: Use washers (1). Tightening torque = 58 Nm (42 ft. lbs.). | 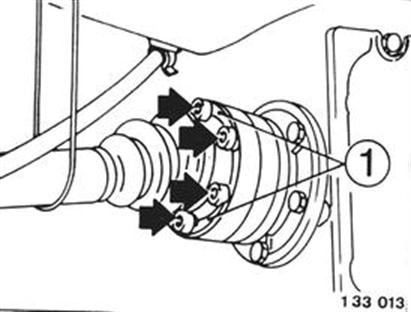 |
Unscrew nuts of propeller shaft on the final drive. Note: Keep dirt off of joint. Installation: Check gasket, replacing if necessary. Replace self-locking nuts. Tightening torque = 32 Nm (23 ft. lbs.). | 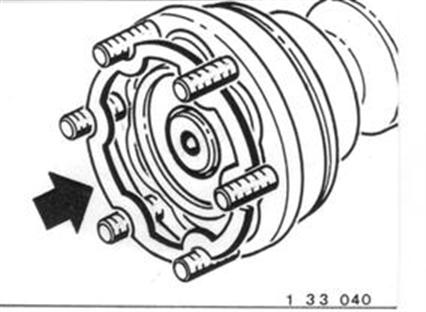 |
Lower the lifter slowly until the final drive is about 2 cm (3/4") above the stabilizer. Support the axle pipe with, for example, a garage jack in this position. | |
Unscrew bolts. S = washer Back out lifter with the final drive. Installation: Tightening torque = 67 Nm (48 ft. lbs.). | 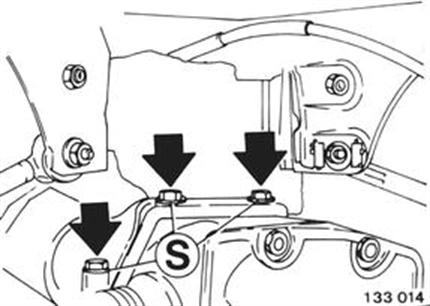 |