Unscrew push rod on stabilizer. Installation: Tightening torque = 59 Nm (43 ft. lbs.). | 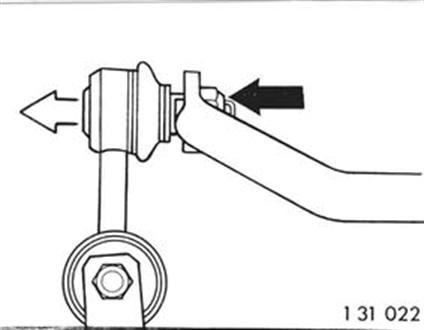 |
Unscrew nut and press off guide joint with Special Tools 31 1 110. Installation: Replace self-locking nut. Keep grease off of journal and bore. Tightening torque = 62 Nm (45 ft. lbs.). | 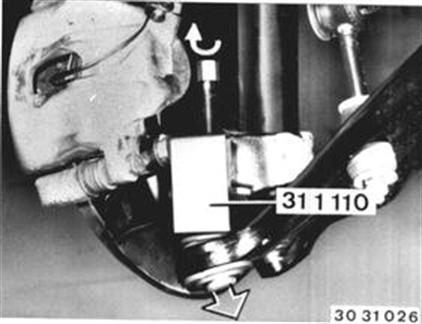 |
Unscrew nut and press off tie rod joint with Special Tool 32 2 070. Installation: Replace self-locking nut. Keep grease off of journal and bore. Tightening torque = 36.4 ± 3.6 Nm (26.5 ± 2.5 ft. lbs.). | 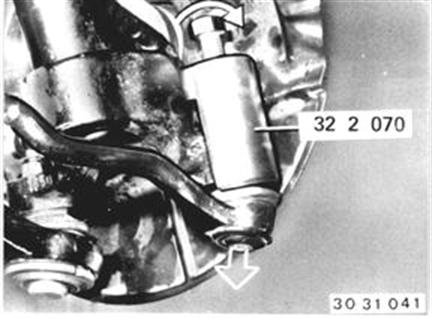 |
Press out and push spring strut over the guide joint journal. | 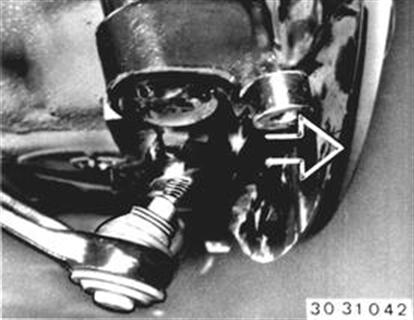 |
Support spring strut. Unscrew nuts. Installation: Replace self-locking nuts. Tightening torque = 22 Nm (16 ft. lbs.). | 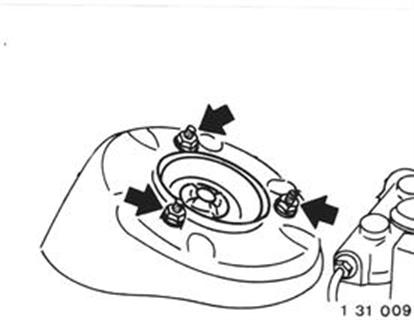 |
Important! Store shock absorbers standing upright only. If shock absorbers are stored laying down with their piston rods run in, they could cause a knocking noise when used in a car again. Remedy: Store shock absorbers with run out piston rods standing upright and at room temperature for 24 hours. | |
SPRING STRUT ASSEMBLY DRAWING 1 End cap 2 Mount 3 Self-locking nut 4 Washer 5 Insulator 6 Washer 7 Rubber damper 8 Protective tube 9 Spring strut pipe 10 Upper spring ring 11 Upper spring retainer 12 Coil spring 13 Shock absorber piston rod 14 Lower spring ring 15 Screw-on ring | 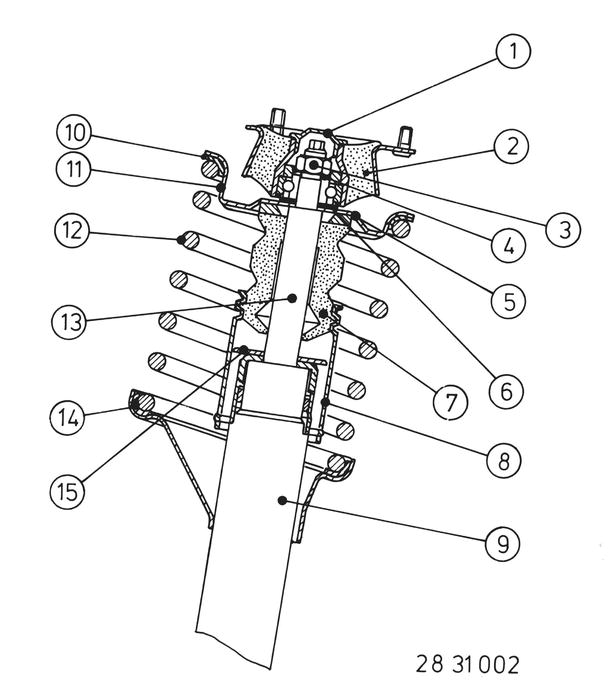 |
 36 10 000