REMOVING AND INSTALLING CLUTCH Important! Liners contain asbestos - refer to safety precautions in Group 00. Checking Clutch Wear Before Removing From Car: Clutch liners are still good, if Special Tool 21 2 060 can be inserted into opening of slave cylinder against the stop.  00 00 000 00 00 000
| 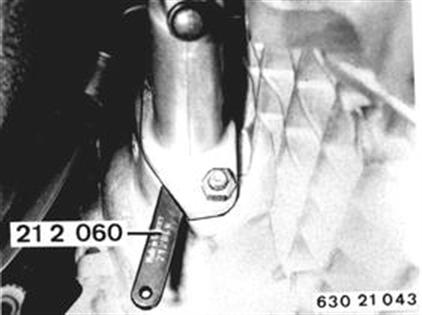 |
Drive plate is worn and must be replaced, if there is a gap (A) of 5 mm (0,197") between Special Tool 21 2 060 and the slave cylinder. | 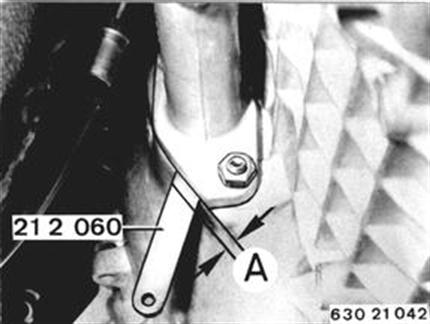 |
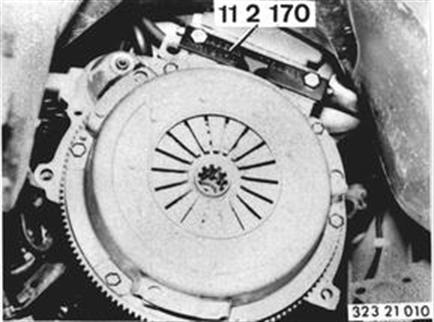
Removing and installing Clutch: Remove transmission - see 23 00. Hold flywheel with Special Tool 11 2 170. Loosen mounting bolts separately by 1 to 1 and 1/2 turns until clutch is relaxed. Remove mounting bolts, clutch disc and drive plate. Clean clutch parts. Liners contain asbestos - conform with the safety precautions. 23 00 000
|  |
Check dirve plate for wear (A)*, cracks and torsion damper for tight fit of spring elements. Important! - Installation: Note transmission end mark on the drive plate. * A = at least 7.5 mm (0.295") thick. | 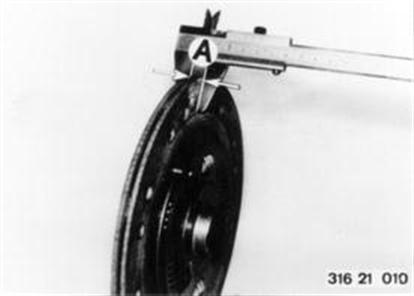 |
Check clutch disc for cracks, wear and burnt spots visually. Pressure contact surfaces must be level. | 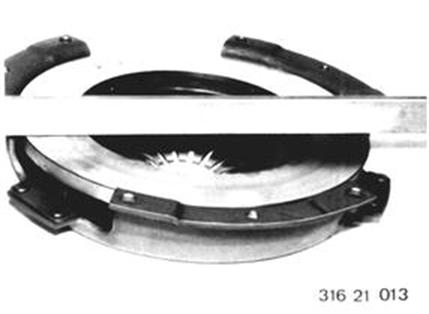 |
Check rivets for wear and tight fit visually. Replace a clutch disc with loose or worn rivet heads. Important! Remove all corrosion inhibiting compound when installing a new clutch disc. | 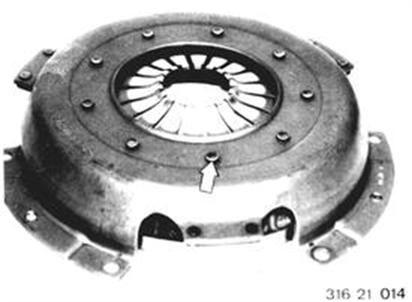 |
Installation: Check that grooved ball bearing in the crankshaft turns easily, replacing if necessary. Check flywheel for scoring. Center drive plate in the flywheel with Special Tool 21 2 100. | 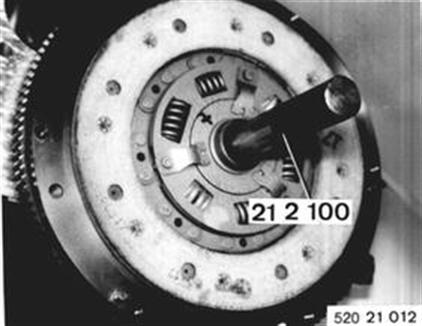 |
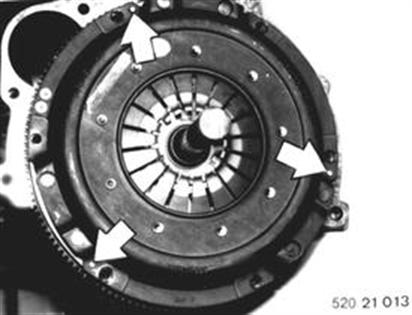
Place clutch disc on dowel pins. Tighten mounting bolts separately and uniformly to specified torque = 23 Nm (16.5 ft. lbs.). Give transmission shaft a light coat of Microlube GL 261 ** in the area of splines and guidepins. ** Source of Supply: HWB
|  |